KNN P.1 – Irregular Data
Subscribe to Tech with Tim
Introduction to KNN
KNN stands for K-Nearest Neighbors. KNN is a machine learning algorithm used for classifying data. Rather than coming up with a numerical prediction such as a students grade or stock price it attempts to classify data into certain categories. In the next few tutorials we will be using this algorithm to classify cars in 4 categories based upon certain features.
Downloading the Data The data set we will be using is the Car Evaluation Data Set from the UCI Machine Learning Repository. You can download the .data file below.
Download Data:

IMPORTANT If you choose to download the file from the UCI website yous must make the following change (if you clicked the download button it has been done for you).
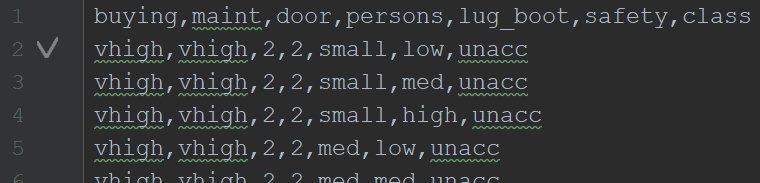
CHANGE: Add the following line to the top of your file and click save. buying,maint,door,persons,lug_boot,safety,class
Your file should now look like the following:
Importing Modules
Before we start we need to import a few modules. Most of these should be familiar to you. The only one we have yet to import is the following:
from sklearn import preprocessing
This will be used to normalize our data and convert non-numeric values into numeric values.
Now our imports should include the following.
import sklearn
from sklearn.utils import shuffle
from sklearn.neighbors import KNeighborsClassifier
import pandas as pd
import numpy as np
from sklearn import linear_model, preprocessing
Loading Data
After placing our car.data file into our current script directory we can load our data. To load our data we will use the pandas module like seen in previous tutorials.
data = pd.read_csv("car.data")
print(data.head())  # To check if our data is loaded correctly
Converting Data
As you may have noticed much of our data is not numeric. In order to train the K-Nearest Neighbor Classifier we must convert any string data into some kind of a number. Luckily for us sklearn has a method that can do this for us.
We will start by creating a label encoder object and then use that to encode each column of our data into integers.
le = preprocessing.LabelEncoder()
The method fit_transform() takes a list (each of our columns) and will return to us an array containing our new values.
buying = le.fit_transform(list(data["buying"]))
maint = le.fit_transform(list(data["maint"]))
door = le.fit_transform(list(data["door"]))
persons = le.fit_transform(list(data["persons"]))
lug_boot = le.fit_transform(list(data["lug_boot"]))
safety = le.fit_transform(list(data["safety"]))
cls = le.fit_transform(list(data["class"]))
Now we need to recombine our data into a feature list and a label list. We can use the zip() function to makes things easier.
X = list(zip(buying, maint, door, persons, lug_boot, safety))  # features
y = list(cls)  # labels
Finally we will split our data into training and testing data using the same process seen previously.
x_train, x_test, y_train, y_test = sklearn.model_selection.train_test_split(X, y, test_size = 0.1)
Full Code
import sklearn
from sklearn.utils import shuffle
from sklearn.neighbors import KNeighborsClassifier
import pandas as pd
import numpy as np
from sklearn import linear_model, preprocessing

data = pd.read_csv("car.data")
print(data.head())

le = preprocessing.LabelEncoder()
buying = le.fit_transform(list(data["buying"]))
maint = le.fit_transform(list(data["maint"]))
door = le.fit_transform(list(data["door"]))
persons = le.fit_transform(list(data["persons"]))
lug_boot = le.fit_transform(list(data["lug_boot"]))
safety = le.fit_transform(list(data["safety"]))
cls = le.fit_transform(list(data["class"]))

predict = "class"  #optional

X = list(zip(buying, maint, door, persons, lug_boot, safety))
y = list(cls)

x_train, x_test, y_train, y_test = sklearn.model_selection.train_test_split(X, y, test_size = 0.1)